Table of contents
- Description
- Plugin Name and Description
- Modifying the GUI
- InputTensorPreparatorThread::deploy()
- ModelThread::deploy()
Tutorial 3 - Groove to Drum Accompaniment using MIDI File
In this tutorial, we will use the same model as the previous tutorials, so make sure you have completed the previous tutorials.
the source code for this tutorial is available in the tutorials branch of the repository.
Description
The model provided in the previous tutorials converts a single voice groove into a drum pattern. Moreover, it allows for specifying the density of the generated pattern.
In this tutorial, we will create a plugin which allows the user to drop in a MIDI file containing any pattern (assuming 2-bars and 4/4 time signature).
In this case, the plugin will need to do the following:
- Enable the user to drop in a MIDI file
- Analyze the MIDI file and extract the groove
- Run Inference on the extracted groove
- Extract the drum pattern from the inference result
Plugin Name and Description
As mentioned here, we need to specify the name of the plugin as well as some descriptions for it.
To do this, we will modify the NeuralMidiFXPlugin/NeuralMidiFXPlugin/CMakeLists.txt file as follows:
project(Tutorial3NMFx VERSION 0.0.1)

set (BaseTargetName Tutorial3NMFx)

....

juce_add_plugin("${BaseTargetName}"
        COMPANY_NAME "AIMCTutorials"
        ...
        PLUGIN_CODE AZCM                # a unique 4 character code for your plugin
        ...
        PRODUCT_NAME "Tutorial3NMFx")           # Replace with your plugin title
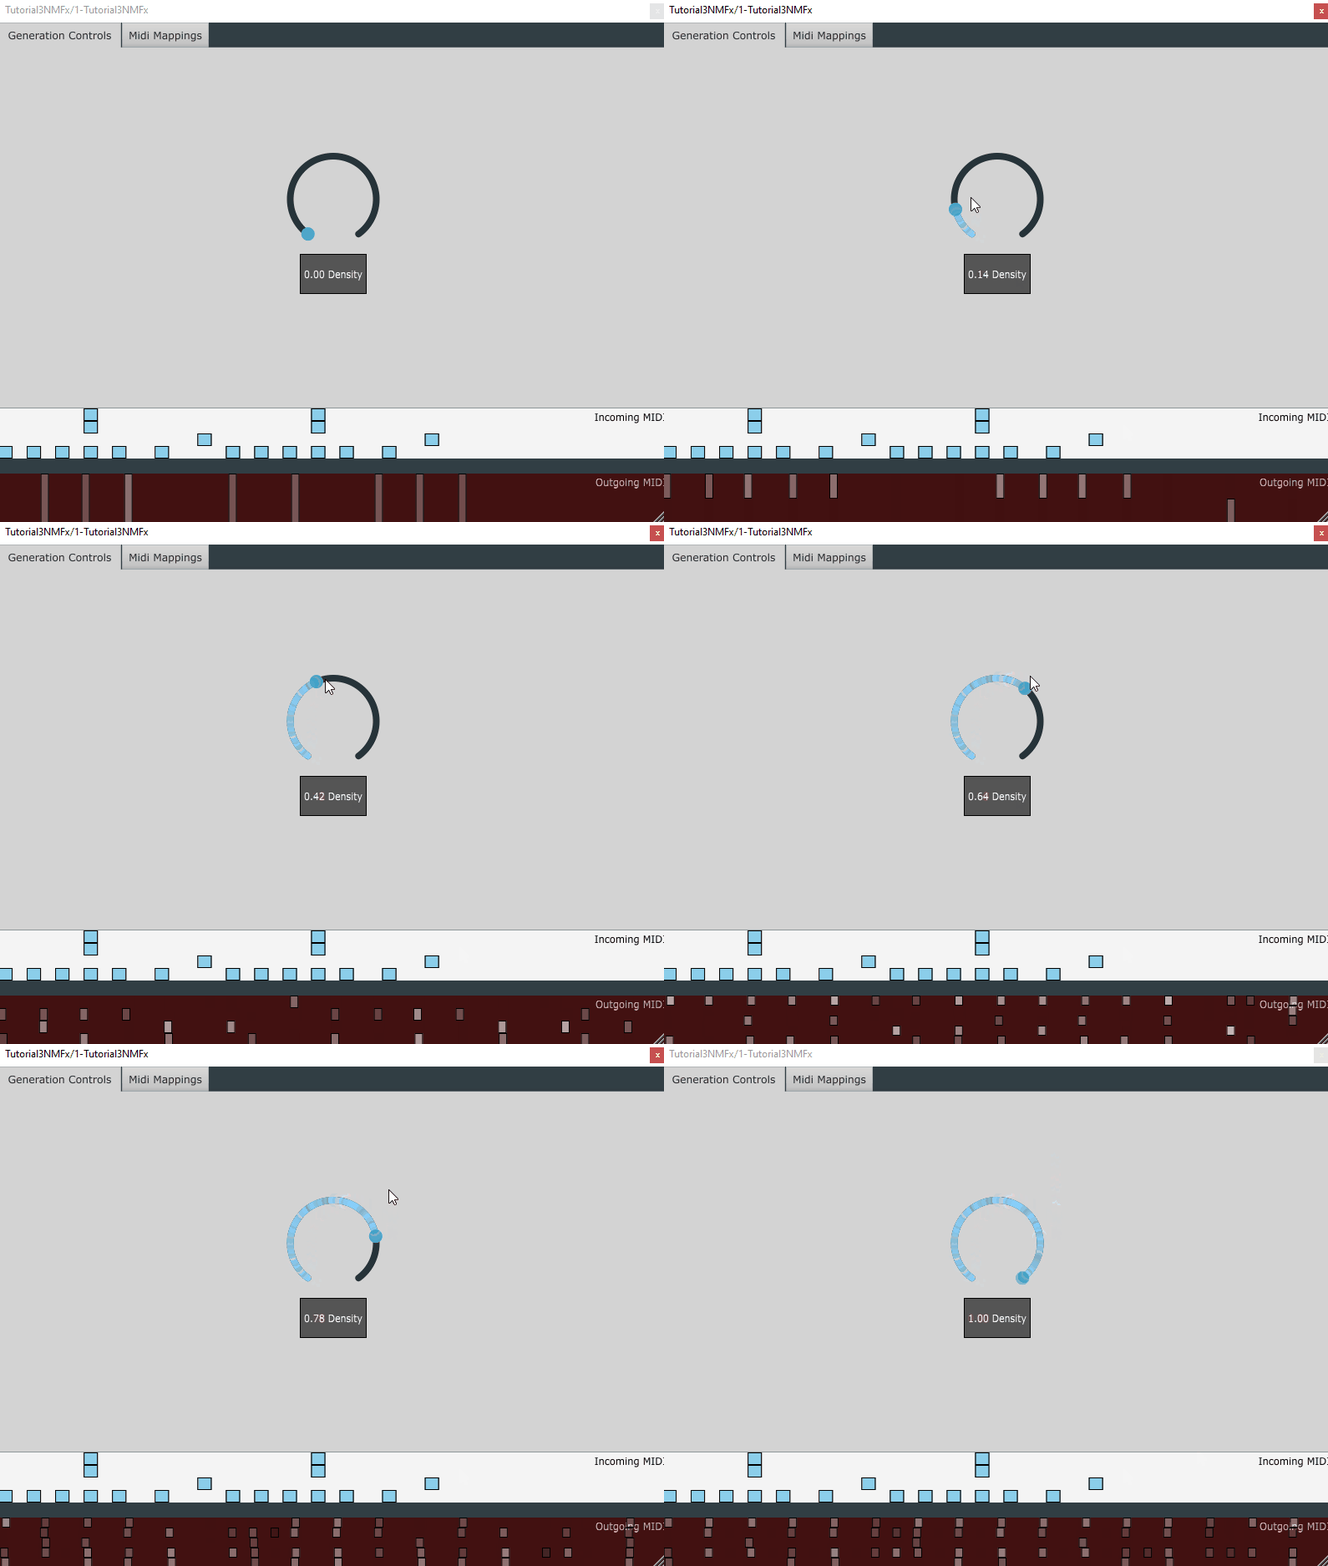
Once you re-build the cmake project, and re-build the plugin, you should see the name of the plugin change in the DAW:
Now we are ready to move on to the next step.
Modifying the GUI
To customize the GUI we will be modifying the Configs_GUI.h file.
Density Slider
On the first tab of the plugin, we will add a slider to control the density of the generated drum pattern.
            // Configs_GUI.h

            // rest of the code ...

            tab_tuple
            {
                "Generation Controls",
                slider_list
                {
                },
                rotary_list
                {
                    rotary_tuple {"Density", 0, 1, 0.5, "Kg", "Pr"},
                },
                button_list
                {
                }
            },

            // rest of the code ...
Enabling Drag and Drop
To allow for Drag/Drop features, we will modify MidiInVisualizer in the same file as follows:
            // Configs_GUI.h

            // rest of the code ...

            namespace MidiInVisualizer {

                const bool enable = true;
                const bool allowToDragInMidi = true;

                // rest of the code ...

            }
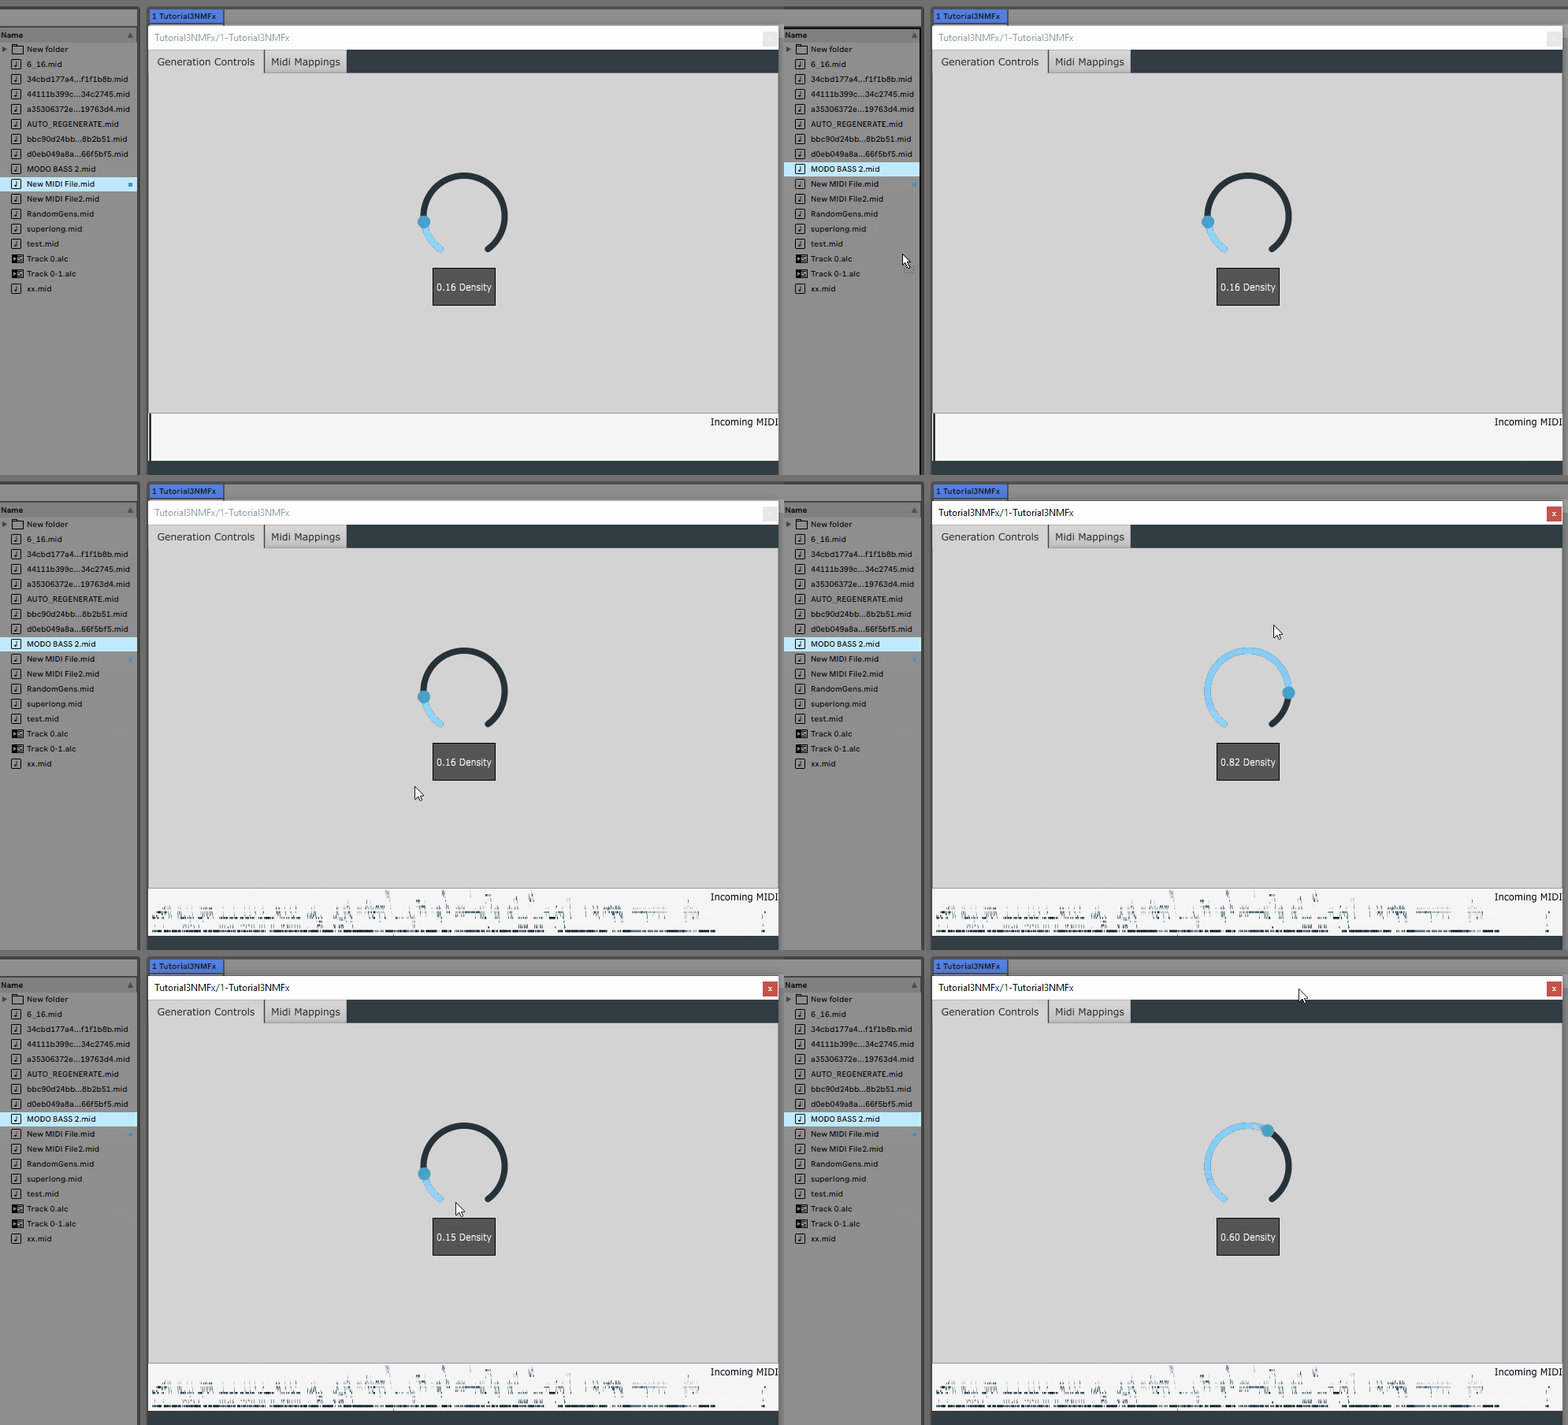
Having done this, the plugin should have the following appearance and also allow for drag/drop of MIDI files:
InputTensorPreparatorThread::deploy()
This is the first time we are using the InputTensorPreparatorThread class as until now none of the tasks required an input to be prepared before running inference.
To prepare the input tensor, let’s take a quick look at the python script which was serialized for encoding an input groove into a tensor:
    def encode(self, groove, density):
        """ Encodes a given input sequence of shape (batch_size, seq_len, embedding_size_src) into a latent space
        of shape (batch_size, latent_dim)

        :param groove: the input sequence of shape (batch_size, 32, 3) where 32 is the number of steps

        :return: mu, log_var, latent_z (each of shape [batch_size, latent_dim])
        """
What can be seen above is that we will create three tensors for hits, velocities, and offsets, each of shape [1, 32, 1]. The groove information will then be placed in the third voice (closed hihat channel) of the tensor.
Remember that the ITP Deploy() method is called every time a new MIDI event arrives or whenever the GUI parameters change. Moreover, the method is called one event at a time.
Declaring Required Local Variables in ITPData
Given that we will repeatedly update hits, velocities, and offsets tensors upon arrival of new MIDI events, we will need to create these tensors somewhere outside the deploy() function. To this end, we will start with modifying the ITPData struct in Configs_CustomStructs.h.
            // Configs_CustomStructs.h

            // rest of the code ...

            struct ITPData
            {
                torch::Tensor hits = torch::zeros({1, 32, 1}, torch::kFloat32);
                torch::Tensor velocities = torch::zeros({1, 32, 1}, torch::kFloat32);
                torch::Tensor offsets = torch::zeros({1, 32, 1}, torch::kFloat32);

                // rest of the code ...
            };

            // rest of the code ...
Declaring What Data to be Sent to Model Thread
Once the input tensors are ready, we will need to send them to the model thread. That said, instead of sending the tensors themselves, we can send a concatenated version of them (see the python script above).
To this end, we will modify the ModelInput struct in Configs_CustomStructs.h.
            // Configs_CustomStructs.h

            // rest of the code ...

            struct ModelInput {
                torch::Tensor hvo = torch::zeros({1, 32, 3}, torch::kFloat32);

                // rest of the code ...
            };
Accessing the MIDI File
Let’s start with accessing a dropped MIDI file!
As mentioned in the documentation, the plugin will provide the Midi data one event at a time. To access these, we will modify the ITP_Deploy.cpp accordingly:
// ITP_Deploy.cpp

bool InputTensorPreparatorThread::deploy(
    std::optional<MidiFileEvent> & new_midi_event_dragdrop,
    std::optional<EventFromHost> & new_event_from_host,
    bool gui_params_changed_since_last_call) {

    bool SHOULD_SEND_TO_MODEL_FOR_GENERATION_ = false;

    // =================================================================================
    // ===         ACCESSING INFORMATION (EVENTS) RECEIVED FROM
    //                Mannually Drag-Dropped Midi Files
    // Refer to:
    // https://neuralmidifx.github.io/docs/v1_0_0/datatypes/MidiFileEvent
    // =================================================================================

    // check if there is a new midi file event
    if (new_midi_event_dragdrop.has_value())
    {
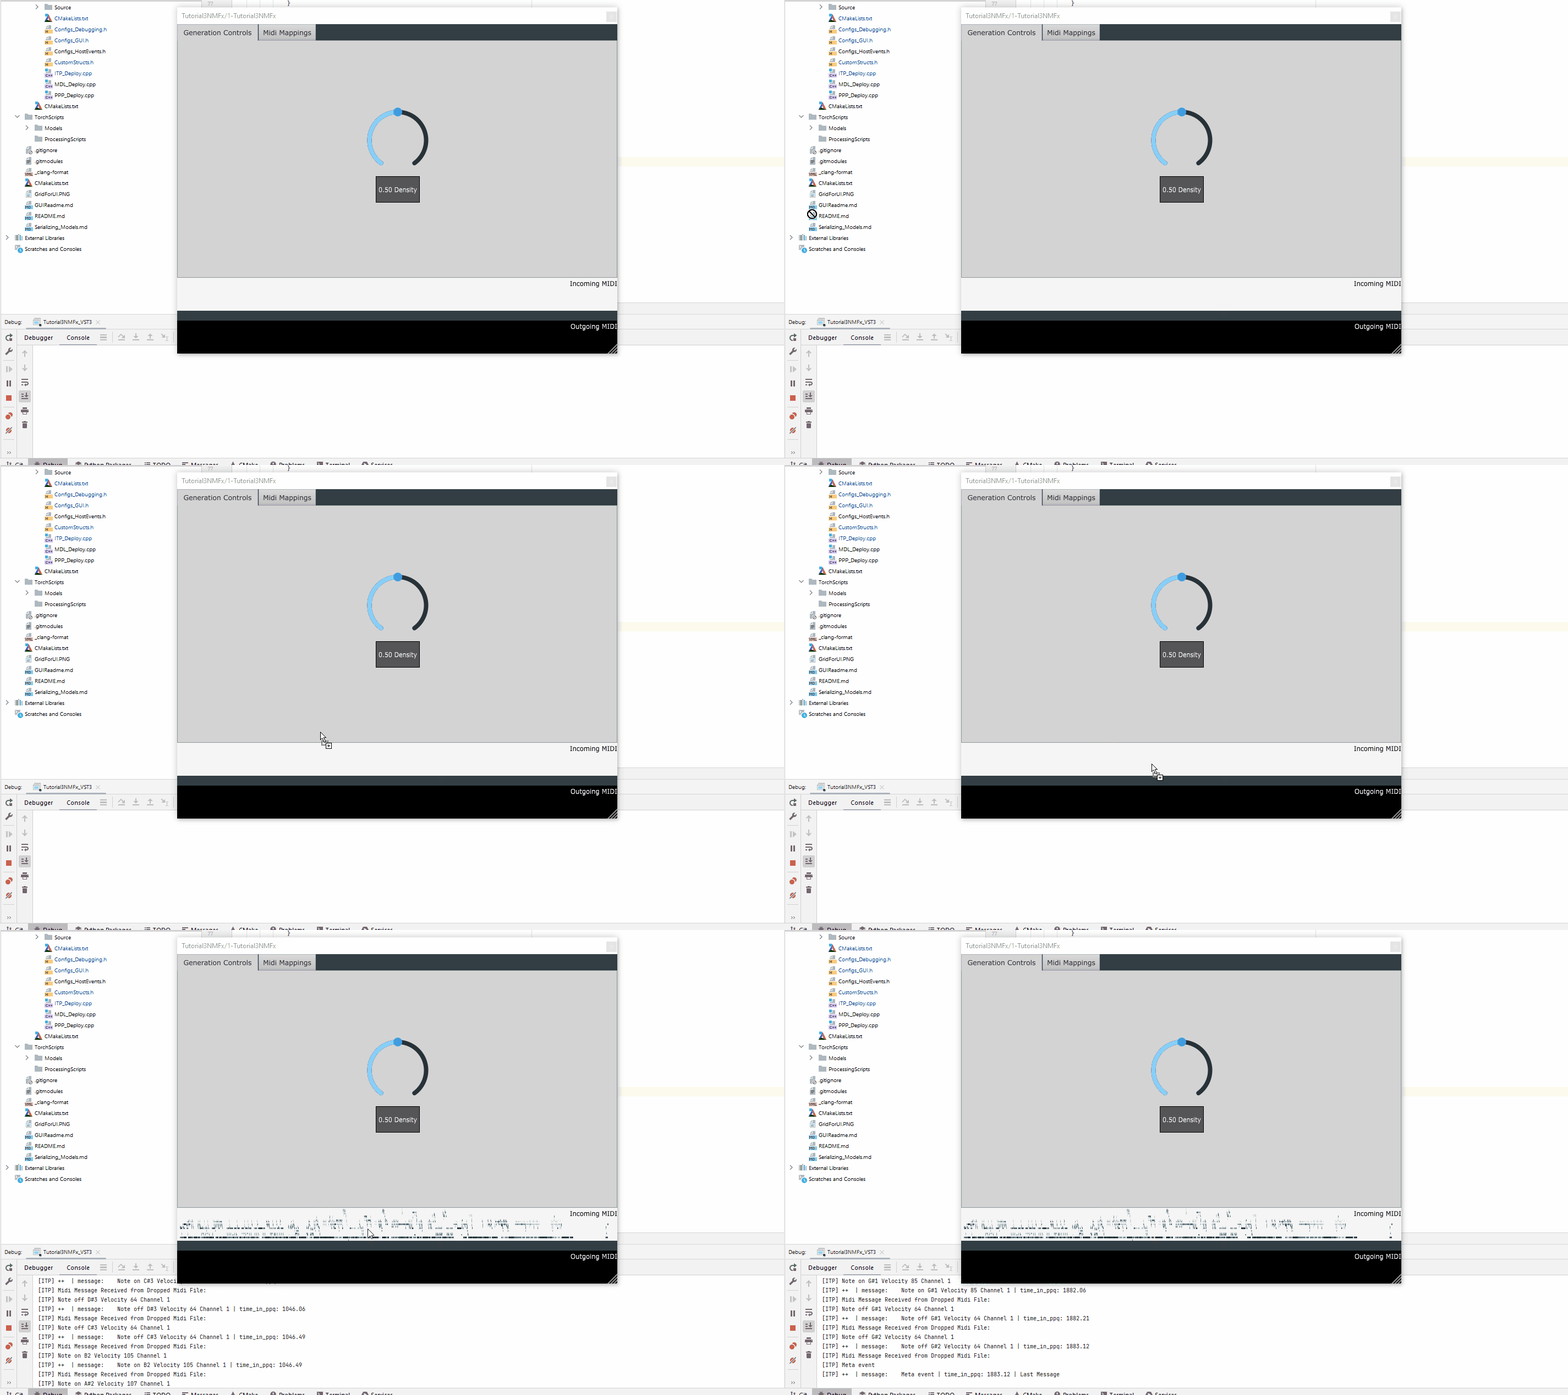
        PrintMessage(new_midi_event_dragdrop->getDescription().str());
    }

    return SHOULD_SEND_TO_MODEL_FOR_GENERATION_;
}
Preparing the Input Tensor (Groove)
The groove in this context is basically a flattened version of a polyphonic pattern. Moreover, the groove is only based on the onsets of the notes.
What this means is that for each Midi event arrived, we will:
- check if NoteOn
- Figure out the closest step to the onset of the note
- Calculate the offset of the note
- Set the corresponding step in the
hitstensor to 1 - Set the corresponding step in the
velocitiestensor to the velocity of the note - Set the corresponding step in the
offsetstensor to the offset of the note - For overlapping notes, use the loudest one
As a result, the deploy() method will look like this:
    // ITP_Deploy.cpp

    // rest of the code ...

    if (new_midi_event_dragdrop.has_value()) {

        if (new_midi_event_dragdrop->isFirstMessage()) {
            // clear hits, velocities, offsets
            ITPdata.hits = torch::zeros({1, 32, 1}, torch::kFloat32);
            ITPdata.velocities = torch::zeros({1, 32, 1}, torch::kFloat32);
            ITPdata.offsets = torch::zeros({1, 32, 1}, torch::kFloat32);
        }

        if (new_midi_event_dragdrop->isNoteOnEvent()) {
            auto ppq  = new_midi_event_dragdrop->Time(); // time in ppq
            auto velocity = new_midi_event_dragdrop->getVelocity(); // velocity
            auto div = round(ppq / .25f);
            auto offset = (ppq - (div * .25f)) / 0.125 * 0.5 ;
            auto grid_index = (long long) fmod(div, 32);

            // check if louder if overlapping
            if (ITPdata.hits[0][grid_index][0].item<float>() > 0) {
                if (ITPdata.velocities[0][grid_index][0].item<float>() < velocity) {
                    ITPdata.velocities[0][grid_index][0] = velocity;
                    ITPdata.offsets[0][grid_index][0] = offset;
                }
            } else {
                ITPdata.hits[0][grid_index][0] = 1;
                ITPdata.velocities[0][grid_index][0] = velocity;
                ITPdata.offsets[0][grid_index][0] = offset;
            }
        }

        // if all messages have been received, send to model for generation
        if (new_midi_event_dragdrop->isLastMessage()) {

            model_input.hvo = torch::concat(
                {ITPdata.hits, ITPdata.velocities, ITPdata.offsets}, 2);
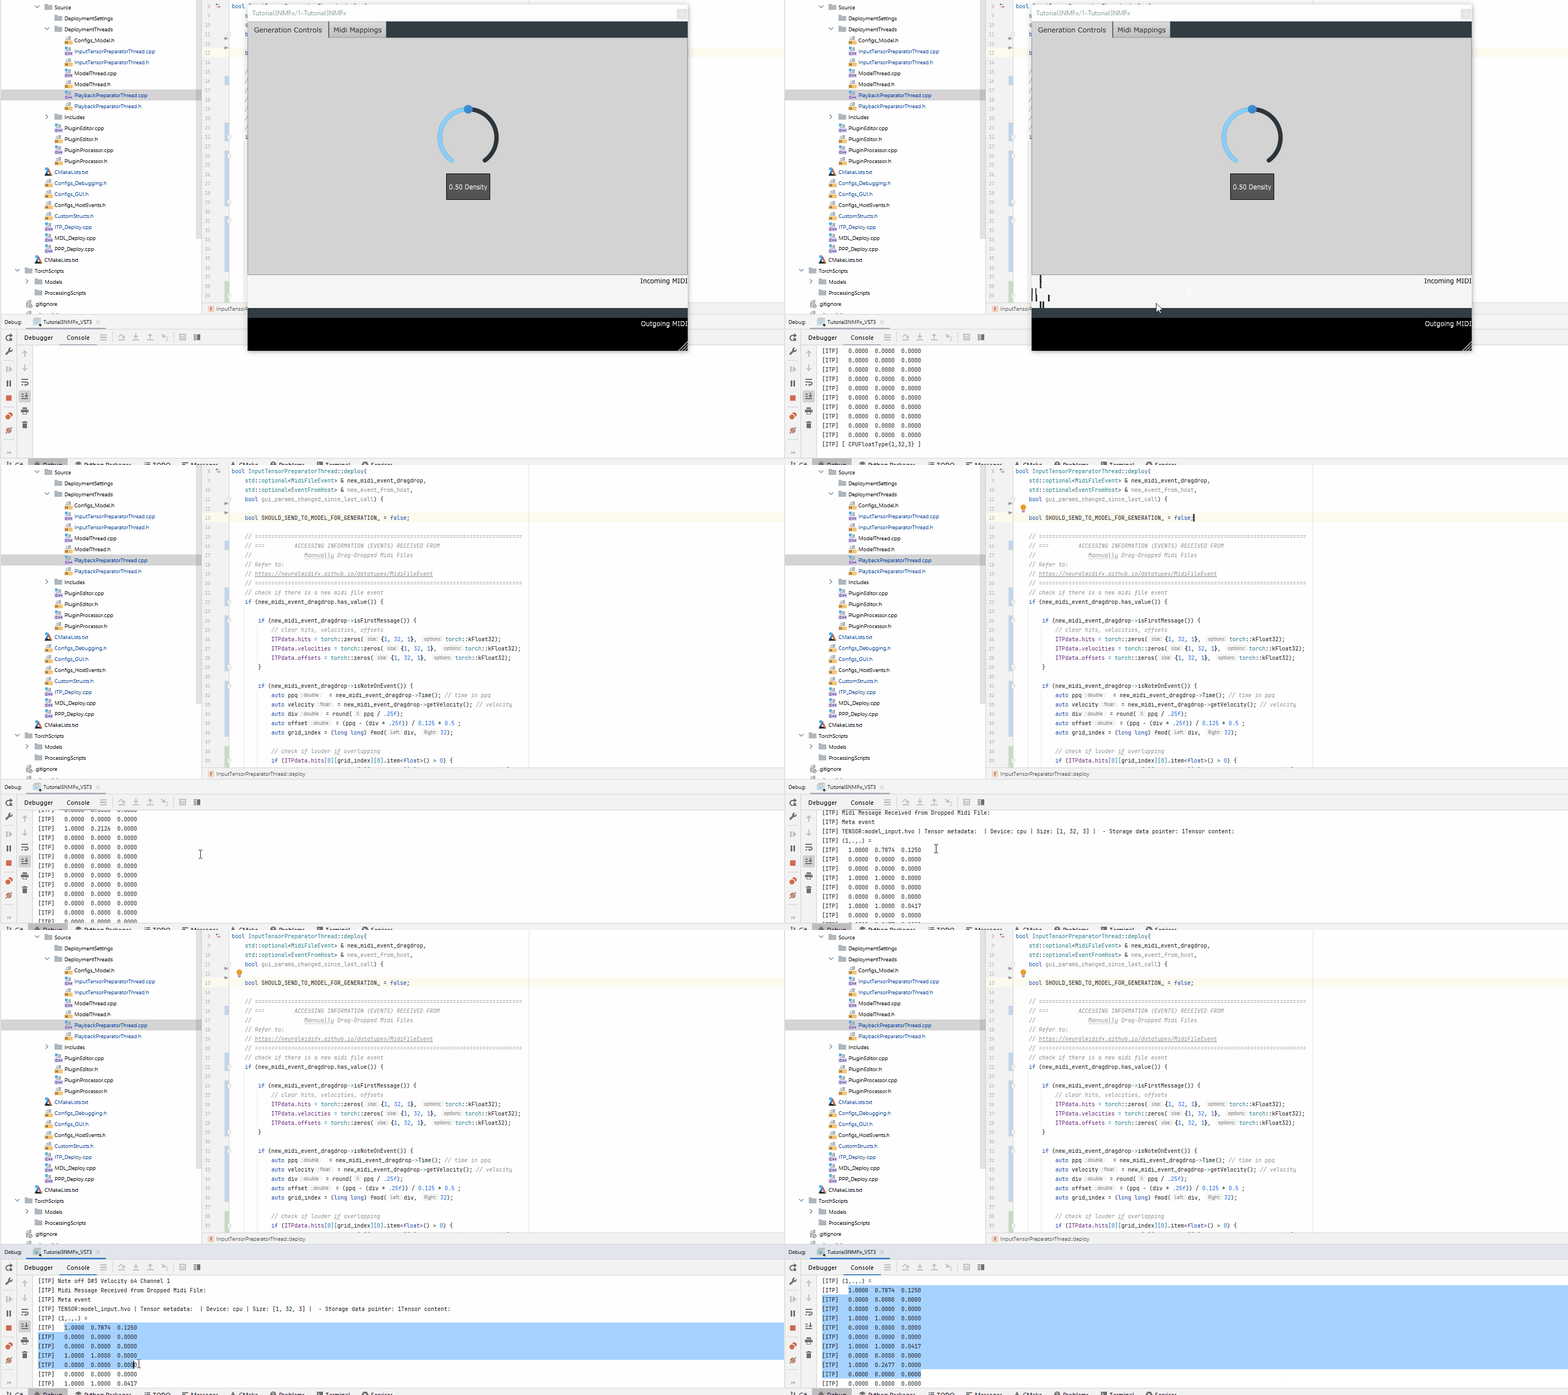
            DisplayTensor(model_input.hvo, "model_input.hvo");

            SHOULD_SEND_TO_MODEL_FOR_GENERATION_ = true;
        }
    }

    // rest of the code ...
ModelThread::deploy()
Now, let’s move on to the Model Thread.
For this part, we will need to modify the deploy() method in the MDL_Deploy.cpp
Encoding the Groove with the Density Value
Accessing the Density Value
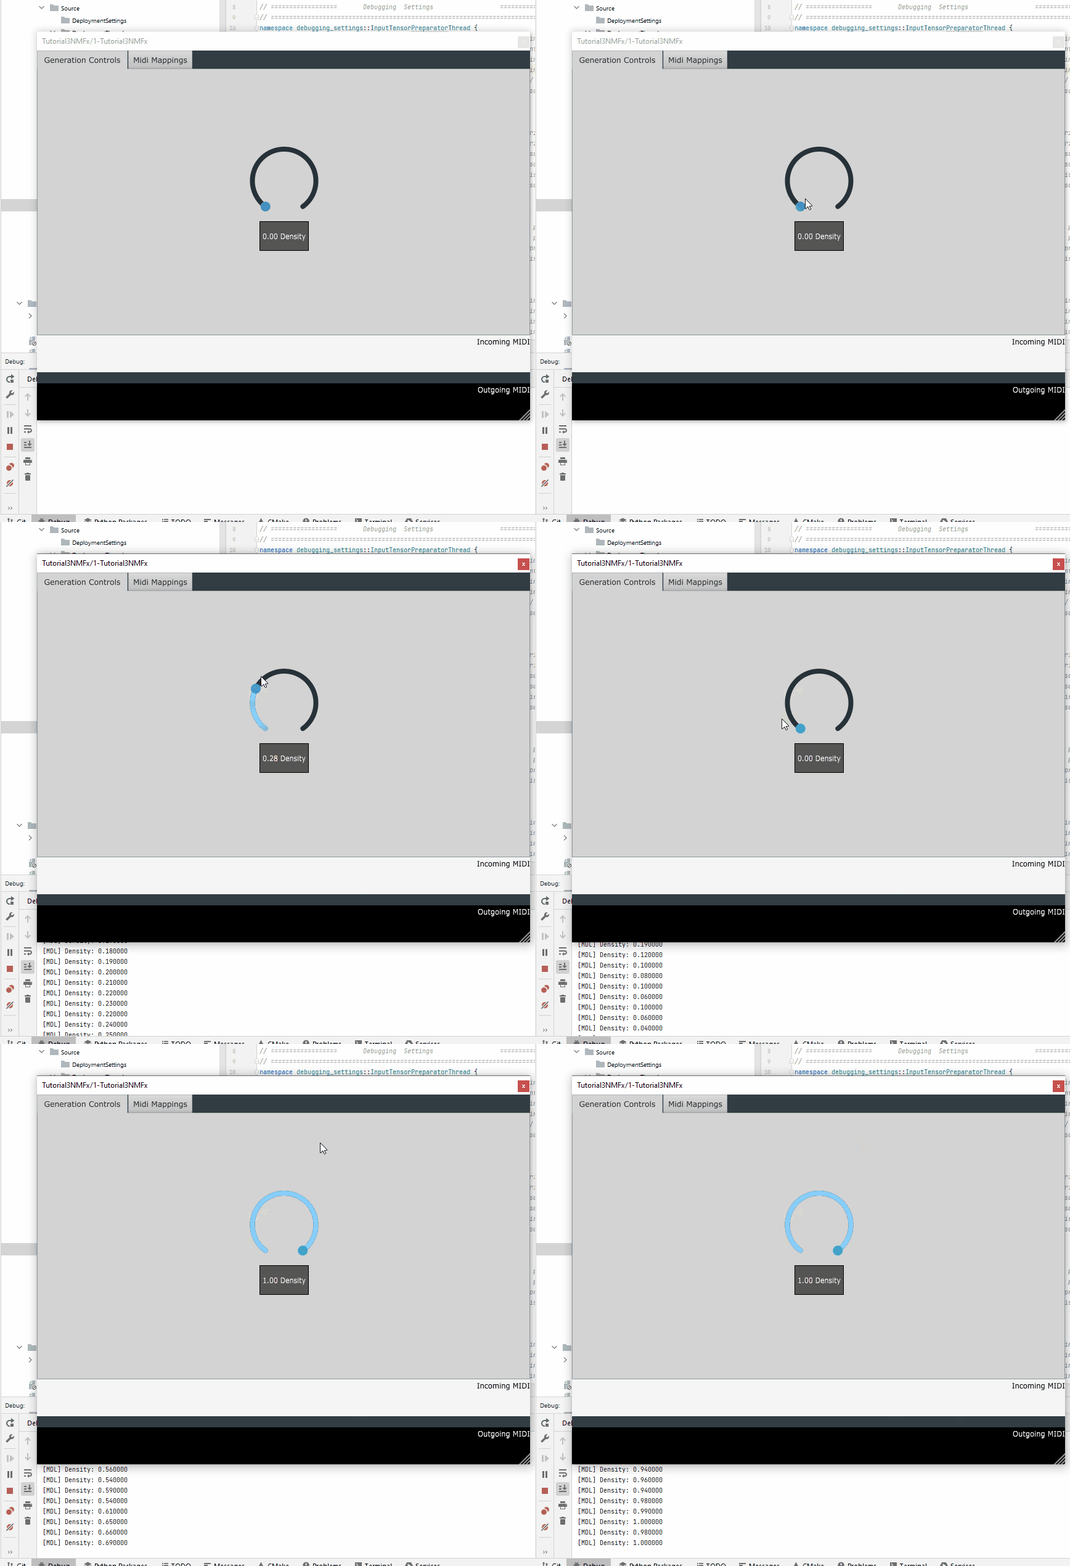
As mentioned earlier, in addition to the groove, the model also accepts a density value. We have already added a slider for this to the GUI. Now, we just need to access it
// MDL_Deploy.cpp

bool ModelThread::deploy(bool new_model_input_received,
                         bool did_any_gui_params_change) {

    /*              IF YOU NEED TO PRINT TO CONSOLE FOR DEBUGGING,
    *                  YOU CAN USE THE FOLLOWING METHOD:
    *                      PrintMessage("YOUR MESSAGE HERE");
    */

    // flag to indicate if a new pattern has been generated and is ready for transmission
    // to the PPP thread
    bool newPatternGenerated = false;

    // =================================================================================
    // ===         0. LOADING THE MODEL
    // =================================================================================
    // Try loading the model if it hasn't been loaded yet
    if (!isModelLoaded) {
        load("drumLoopVAE.pt");
    }


    // =================================================================================
    // ===              ACCESSING GUI PARAMETERS
    // Refer to:
    // https://neuralmidifx.github.io/docs/v1_0_0/datatypes/GuiParams#accessing-the-ui-parameters
    // =================================================================================
    auto density = gui_params.getValueFor("Density");
    PrintMessage("Density: " + std::to_string(density));

    return newPatternGenerated;
}
encode()
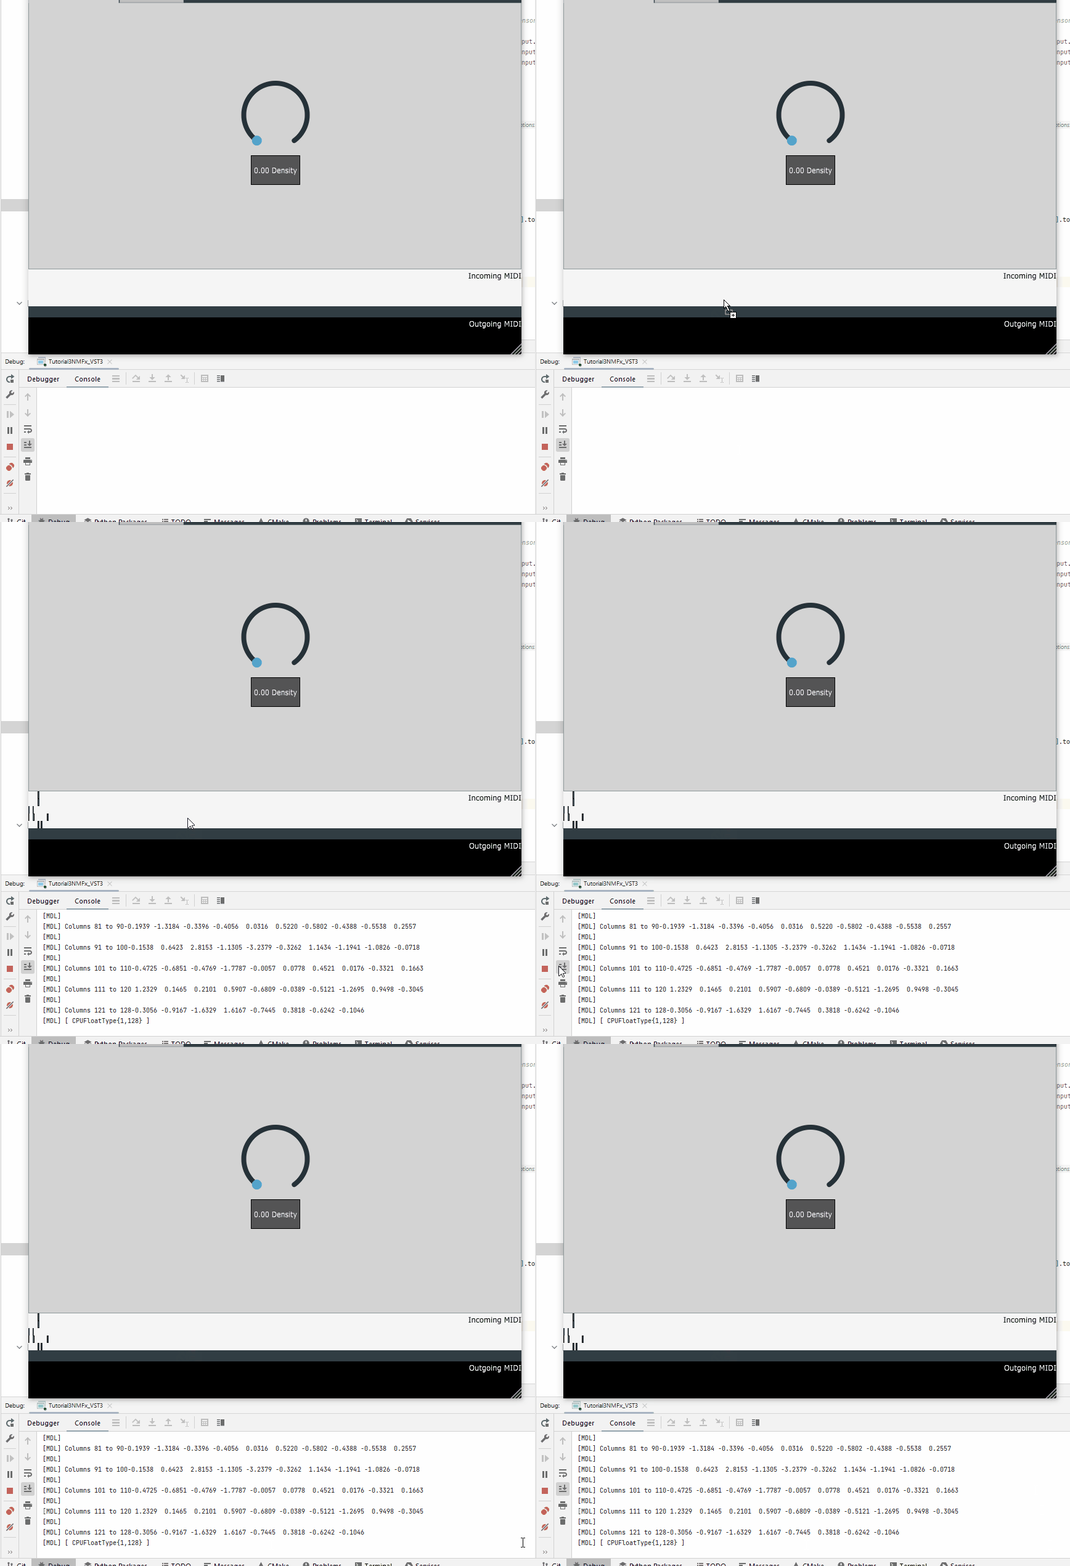
Now, we need to prepare the inputs to the encode method. Then, we can use the prepared inputs and encode the groove and the density value into a latent vector.
// MDL_Deploy.cpp

bool ModelThread::deploy(bool new_model_input_received,
                         bool did_any_gui_params_change) {

    /*              IF YOU NEED TO PRINT TO CONSOLE FOR DEBUGGING,
    *                  YOU CAN USE THE FOLLOWING METHOD:
    *                      PrintMessage("YOUR MESSAGE HERE");
    */

    // flag to indicate if a new pattern has been generated and is ready for transmission
    // to the PPP thread
    bool newPatternGenerated = false;

    // =================================================================================
    // ===         0. LOADING THE MODEL
    // =================================================================================
    // Try loading the model if it hasn't been loaded yet
    if (!isModelLoaded) {
        load("drumLoopVAE.pt");
    }

    // get the density value
    auto density = gui_params.getValueFor("Density");

    // get latest groove received from ITP
    auto hvo = model_input.hvo;

    // preparing the input to encode() method
    std::vector<torch::jit::IValue> enc_inputs;
    enc_inputs.emplace_back(hvo);
    enc_inputs.emplace_back(torch::tensor(density, torch::kFloat32));

    // get the encode method
    auto encode = model.get_method("encode");

    // encode the input
    auto encoder_output = encode(enc_inputs);

    // get latent vector from encoder output
    auto latent_vector = encoder_output.toTuple()->elements()[2].toTensor();

    // Display the latent vector
    DisplayTensor(latent_vector, "Latent Vector");

    return newPatternGenerated;
}
Decoding the Latent Vector
We have done the hard part. Now, we just need to reuse the decoding scripts from the previous tutorial.
// MDL_Deploy.cpp

    // previous code ...

    // Prepare other inputs
    auto voice_thresholds = torch::ones({9 }, torch::kFloat32) * 0.5f;
    auto max_counts_allowed = torch::ones({9 }, torch::kFloat32) * 32;
    int sampling_mode = 0;
    float temperature = 1.0f;

    // Prepare above for inference
    std::vector<torch::jit::IValue> inputs;
    inputs.emplace_back(latentVector);
    inputs.emplace_back(voice_thresholds);
    inputs.emplace_back(max_counts_allowed);
    inputs.emplace_back(sampling_mode);
    inputs.emplace_back(temperature);

    // Get the scripted method
    auto sample_method = model.get_method("sample");

    // Run inference
    auto output = sample_method(inputs);

    // Extract the generated tensors from the output
    auto hits = output.toTuple()->elements()[0].toTensor();
    auto velocities = output.toTuple()->elements()[1].toTensor();
    auto offsets = output.toTuple()->elements()[2].toTensor();

    // wrap the generated tensors into a ModelOutput struct
    model_output.hits = hits;
    model_output.velocities = velocities;
    model_output.offsets = offsets;

    // Set the flag to true
    newPatternGenerated = true;

    // Rest of the code ...
Assuming that the PPP thread is exactly the same as the previous tutorial, we can see that the plugin is now working as expected:
